Have you ever captured what you thought was the perfect moment, only to find the footage grainy, dull, or just not as breathtaking as it seemed in real life? If this sounds familiar, you’re not alone. Every filmmaker, content creator, and aspiring videographer has faced the frustration of not achieving the desired clarity in their visuals. But what if the solution wasn’t about how much you spend on equipment, but how well you master your tools?
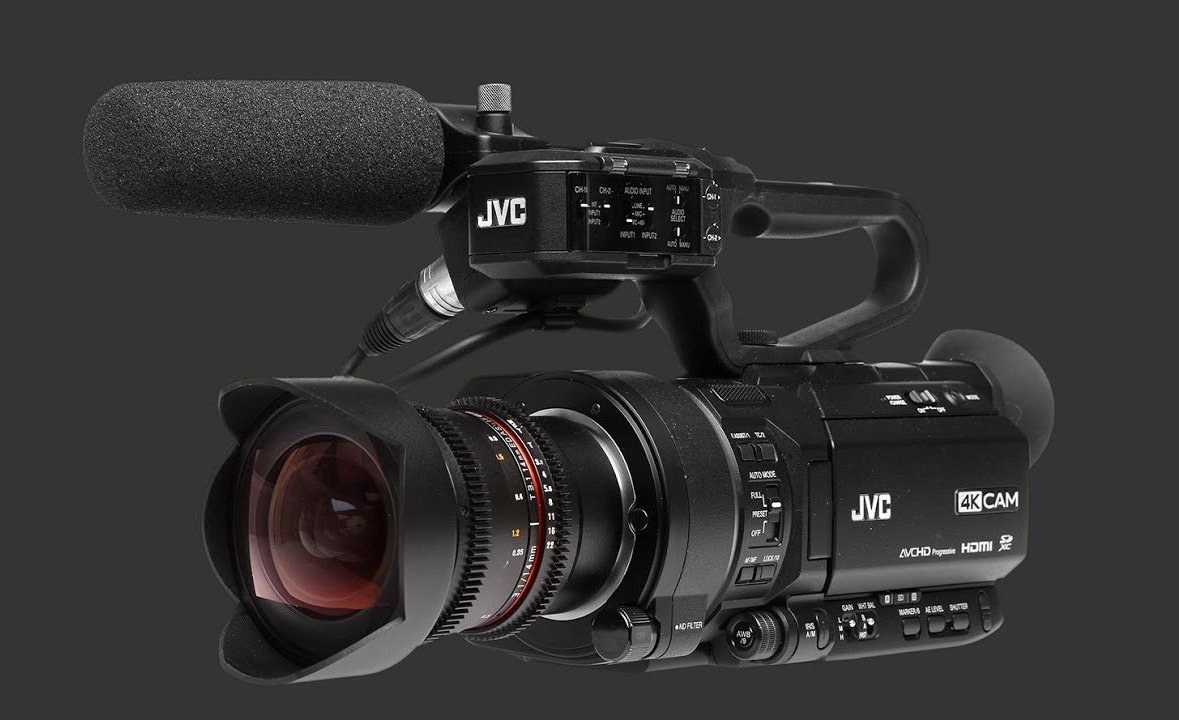
With focus on the JVC GY-HM170 camcorder—a lightweight, high-performance camera capable of delivering professional-quality visuals. This guide from TechVolt Media Group, a leader in digital storytelling and content creation, will take you on a journey to unleash the full potential of this remarkable gadget. Whether you’re shooting a wedding, crafting a promotional video, or working on your next YouTube masterpiece, these tips will help you capture visuals so clear and captivating.
Why Do Videos Fall Short of Expectations?
Before diving into the solutions, let’s explore why so many videos fail to hit the mark:
- Improper Camera Settings: Most people stick to default settings, which may not be optimized for every scenario.
- Poor Lighting: Lighting makes or breaks video quality. Even the best camera struggles in subpar conditions.
- Shaky Footage: Lack of stability can make even the clearest images appear blurry.
- Overlooking Post-Processing: Raw footage often needs fine-tuning to bring out its best.
The good news? These issues are fixable. By mastering the five key steps outlined below, you’ll elevate your visuals from ordinary to extraordinary.
Step 1: Understand Your Camera’s Features
The JVC GY-HM170 isn’t just any camcorder; it’s a powerhouse designed for professional-grade results. Here are the essential features to master:
- 4K Ultra HD Recording: Take advantage of the camera’s 3840×2160 resolution for unparalleled clarity.
- Advanced Zoom: The 12x optical zoom ensures you can capture distant details without losing quality.
- Professional Audio: With dual XLR audio inputs, your visuals will be complemented by crystal-clear sound.
- Manual Controls: From focus to white balance, manual adjustments give you total control over your footage.
Familiarize yourself with the camera’s menu. Spend time experimenting with different settings so you’re prepared for any shooting scenario.
Step 2: Perfect the Lighting
Lighting is the unsung hero of crisp visuals. Even the best camcorder can’t compensate for poor lighting.
Tips for Optimal Lighting:
- Natural Light: Golden hour (an hour after sunrise or before sunset) provides soft, flattering light.
- Artificial Light: Use ring lights or LED panels to illuminate your subject evenly.
- Avoid Harsh Shadows: Use diffusers or bounce boards to soften intense light sources.
During a recent wedding shoot, TechVolt Media Group leveraged soft LED lights to capture the bride’s intricate red gown without overexposing the details. The result is a stunning clarity that highlighted every stitch.

Step 3: Stabilize Your Shots
Shaky footage is a visual distraction that detracts from your storytelling. Thankfully, it’s avoidable.
How to Achieve Stability:
- Tripod: A sturdy tripod ensures steady shots for interviews and stationary scenes.
- Gimbals: For dynamic shots, a gimbal offers smooth motion stabilization.
- Built-in Stabilization: The JVC GY-HM170’s advanced image stabilization can counter minor shakes.
Without a tripod, your footage could be a jittery mess. With stabilization tools, you capture the serene majesty in perfect detail.
Step 4: Optimize Your Settings for Different Scenarios
One size doesn’t fit all when it comes to video settings. Tailoring your camera’s parameters to your environment ensures optimal results.
Key Settings to Adjust:
- Shutter Speed: For smooth motion, use a shutter speed double your frame rate (e.g., 1/50 for 25fps).
- ISO: Keep ISO low (100-400) to minimize grain, especially in well-lit conditions.
- White Balance: Set this manually to ensure accurate color reproduction.
Scenario-Specific Settings:
- Outdoor Shoots: Use ND filters to avoid overexposure in bright sunlight.
- Low Light: Open the aperture wider and increase ISO cautiously.
Step 5: Enhance in Post-Production
Even with perfect shooting techniques, post-production is where the magic happens. Tools like Adobe Premiere Pro and DaVinci Resolve can transform raw footage into polished masterpieces.
Essential Post-Production Tips:
- Color Grading: Adjust hues and contrast to achieve a cinematic look.
- Stabilization: Use software tools to smooth out minor shakes.
- Audio Syncing: Ensure the audio matches the visuals for seamless storytelling.
The True Potential of the JVC GY-HM170
The truth is, most people underestimate the JVC GY-HM170. They assume its 4K Ultra HD capabilities will automatically deliver pristine visuals. But here’s the secret: Without precise settings, light control, and overlooked firmware tweaks, even a high-end camcorder can fail to produce professional-grade footage.
This is where the “Crystal Clarity Formula” comes in—a pro-level method that unlocks the hidden power of the JVC GY-HM170 for razor-sharp, visually stunning content.
1. The Frame Rate & Shutter Speed Myth (What No One Tells You)
Most videographers use the standard 24fps for a cinematic look, but this is a mistake when shooting fast-paced events or action scenes. To eliminate motion blur and sharpen details:
- Use 60fps at 1/120s shutter speed for events, sports, and action footage.
- Drop to 30fps at 1/60s for controlled interviews or slow-moving subjects.
- Never use auto shutter—this is where most videographers lose sharpness.
2. Mastering the True Colors of JVC (Beyond Standard White Balance)
Even with 4K recording, colors can look washed out if not configured correctly. Instead of relying on the default white balance presets, use custom Kelvin settings for accuracy:
- Indoor warm lighting: Set Kelvin between 2800K – 3200K
- Daylight shots: Adjust to 5000K – 5600K
- Mixed lighting (event halls, concerts): Use 4500K and tweak color grading later
Secret Pro Tip: Engage the Cine-Like Gamma Curve in Picture Profile settings. This unlocks deeper shadows and richer highlights, giving a high-end film look straight from the camera.
3. Noise-Free Night Footage (How to Avoid Grainy Disasters)
The JVC GY-HM170 performs well in low light—if you know how to control it. The biggest mistake? Cranking up the ISO.
Do NOT push the Gain beyond 9dB—this introduces digital noise. ❌
Instead, lower the Gain and use a fast lens (f/1.8 – f/2.8) or an external LED light to maintain clarity. ✅
Pro Secret: Enable DNR (Dynamic Noise Reduction) but keep it at Low—this smooths out grain without blurring details.
4. The Hidden Autofocus Hack (No More Soft Footage)
The JVC GY-HM170’s autofocus is decent but not perfect. If you rely on auto mode, your footage may appear slightly off. Here’s the fix:
- Use Manual Focus + Focus Assist (Peaking Mode)—this highlights sharp areas in red so you can lock in precision focus before recording.
- For moving subjects, use “Face Detection AF” instead of standard autofocus. This keeps people sharp while avoiding focus hunting.
Why This Works (And Why Most People Overlook It)
- Prevents motion blur and soft focus issues with optimized shutter speed and frame rates.
- Enhances color depth and accuracy by fine-tuning Kelvin and gamma settings.
- Eliminates noise in night shoots with controlled gain and external lighting.
- Ensures tack-sharp clarity using manual focus peaking instead of unreliable autofocus.
Most videographers settle for “good enough” settings—but now you know how to extract pro-level performance from the JVC GY-HM170. So the next time you shoot, ask yourself: Are you letting your camera decide your footage quality, or are you taking full creative control?
Your Path to Visual Excellence
Capturing crisp, clear visuals with the JVC GY-HM170 is a blend of technical know-how and creative vision. By mastering your camera’s features, optimizing lighting, stabilizing footage, adjusting settings, and refining in post-production, you’ll produce content that stands out in today’s crowded digital landscape.
We believe in empowering creators to tell stories that matter. Whether you’re a seasoned professional or just starting, these tips will set you on the path to visual excellence.


